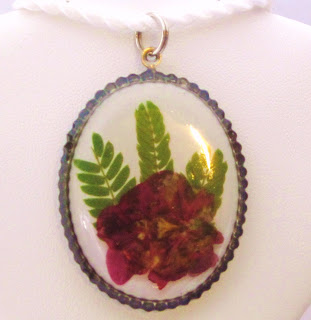
In this blog I will present commented discussions on the advantages and disadvantages of various art resins; discuss how to prepare flowers for use with resin and which flowers have worked best/not worked for me. I will be presenting interviews and discussions with other pressed flower and resin artists. I will have a "tip of the day" section.

I'm hoping that lots of you contribute; comments, arguments and disagreements are always welcome. Resin is such a complex medium that we all have something to learn. Besides, tweaks and even new resin products are coming out all the time.

Sunday, December 12, 2010

Coasters, Pressed Flowers and Resin; introducing SKERRY from Portland

In the World Wide Pressed Flower Guild forum coasters have been discussed a lot recently. I would like to introduce an artist I met on Etsy, who makes wonderful pressed flower coasters. Meet Skerry:


I am a Portland, Oregon artist who primarily creates paintings, mixed-media collages and coasters. I use recycled materials whenever possible, often visiting local salvage shops for ceramic tiles, wood and other one- of- a- kind materials. Botanical imagery is a reoccurring theme in my work, as well as vintage book pages, fabric, lace, catalog scraps, and other found vintage materials.
I make coasters out of recycled ceramic kitchen tiles. I have been using Envirotex Lite two- part pour on resin for probably about three years. I switched to resin because I really wanted to find something durable that would protect the art underneath, and as coasters are functional, something easy to clean.
I often create prints of my original paintings and collages, or glue original paper collages down onto these tiles. I also have done a bit of experimenting with pressing flowers and other plant matter into my designs. I like to collect flowers, branches and bark on neighborhood walks and from my own garden. I press petals into heavy encyclopedias, and come back to them after a few days (if i remember!)
Some petals turn brown, don't press well, completely change colors or lose the look I was going for. Some times they come out too see-through, so I have to think about what background will make them show up in the final product. The pressing part alone can sort of be trial and error, but that seems to be what art-making is all about so I try to just go with it : )
I glue the plant matter directly onto the tiles using a polymer medium. I tape all the edges of my coasters with a removable tape. This prevents drips from becoming permanent on the tile. I pour the resin out of a cup, starting in the center, and use a foam brush to bring it over the edges. I don't worry about dripping over the edges, because the tape is protecting the edges and bottom. After the resin dries, I inspect each piece. Some have bubbles that pop at the surface, and that need another coat. Some of the bumpy materials, like bark, also need another coat or two, just to be completely contained and create a flat surface.
set of four zinnia petal coasters

closeup of pressed bougainvillea petal coaster, pre-resin
pressed bark and botanic print coasters set of four.
Bark was collected from the artist's yard, and prints
were found in an old encyclopedia. (note: blue tape is
removed after tiles have been resined...) Because the bark
is extra bumpy, sometimes at least 2 or 3 layers of resin
is needed


bougainvillea pressed flower coaster, pre resin

bougainvillea with bark from the artist's yard


Problems With Resin.

As much as I love the finished product, I have had a handful of frustrating moments with resin.
Bubbles-- With the envirotex-lite, I still haven't found a fool-proof way to prevent bubbles. I usually blow out the bubbles that rise to the top after about five minutes of pouring. In the next hour or two if I am around, I check back and blow out more. I have heard of people using a propane flame to take care of the bubbles, but I haven't tried that yet. The big bummer is when the resin has set and there is a circular  bubble popping at the surface. Not much you can do at that point but try to flatten it and re-coat.
Stickiness-- Occasionally, I will come across resined coasters that don't set. Either they are sticky all over, or have small areas that remain sticky. This has an uncanny way of happening a day or so before I have a big show. I have found that if they are not mostly tacky after a day, they will never dry! So I will add another coat, and that does the trick. I believe this occurs if I don't get the proportions perfectly, and I have also heard that humidity can effects the setting process.
Changes colors--Sometimes resin will cause color in plants to bleed, or change the color of the petals. I had some bright bougainvillea petals completely bleed out pink around the petal edges, but I actually liked it-- one of those happy accidents I suppose!
Heat Sensitive-- Sometimes resin is harder to work with when it is in a cold environment. Living in the Portland area, and working in the basement means the resin can get cold. If you put the resin and hardener (the whole containers) into a bath of warm water for about 5-7 minutes, it makes the resin more fluid and and puts it in the best workable condition.

mixed media collage with pressed flowers
For more examples of my work, feel free to check out my website by clicking here, or my etsy shop (which will be restocked this week) by clicking here. I also have a blog and a facebook art page that I keep pretty current.

Thursday, November 18, 2010

LETS SEE UNIQUE!

 Today I'm introducing a resin-pressed flower artist with a different bent:  Zipper8Design (http://www.etsy.com/shop/Zipper8Design.)
I came upon her coasters in a random  Etsy search, and really liked her work.  Here she explains how she started and the problems she has with pressing flowers:
I started working with resin while getting a Masters of Architecture, I used it for a project in one of my digital fabrication classes. I was having so much fun that I decided to order some extra for myself to fool around with. That, and a random bottle cap collection I had lying around, led to my first experiments with making trivets and then coasters out of recycled beer bottle caps. For a while my little business really just focused on the bottle caps, until one day I thought, what if I embed something else into my coaster, like say a gingko leaf? I absolutely adore gingko leaves, and there are a lot of gingko trees on the streets of NYC around my apt, so I picked a pretty one off the tree one day, took it home and poured my first botanical coaster. And within about an hour, my leaf was an ugly brown. I was bummed, but thought, well maybe if I just press and dry the leaf first it will stay nice and green? So I started drying leaves, and discovered that it worked!


This past summer when I started trying to press other flowers I ran into a lot of problems, and a lot of brown petals! I tried pressing flowers in the microwave because I'm impatient, but really struggled to master that technique, and ended up with a lot of flowers embedded with the quilted paper towel pattern. Finally I settled on simply putting the flowers between printer paper, and in a big stack of books. I would usually leave them there one weekend, and pull them out the following weekend, the next time I was up in CT. Unfortunately I spent a lot of time refining my technique, and often times wouldn't figure it out until after the flower I was working with had died off. For instance I was trying to press these pretty yellow sundrops that my Mom had bushel loads of. First I pressed them face down, splayed out, but they didn't look so great. Then I test pressed one sprig lying on its side, leaves and stem and all. And it was perfect! The next weekend when I went to press more, all the flowers were gone. Now I just have to wait until next summer to use my new skills, at least for the sundrops.

Overall most of my issues tend to be with the pressing of the flowers. I find the resin really easy to work with, and maybe its just the brand I use but I've never had real issues with bubbles or anything like that. But, the scale of a coaster allows for many more imperfections that would be noticeable at a small scale, such as in a pendant. I'm still learning, and for me the most challenging thing is to plan ahead for the seasons. This fall for instance I collected fall leaves like a mad person, certain that just when I discovered my next great coaster those leaves would be gone, just like my sundrops. So its a learning process but I'm loving it, and my botanical coasters are really popular so I'll just keep doing what I'm doing and learning along the way. For instance, next summer I'm going to hoard queen anne's lace like there's no tomorrow because those have ended up being hugely popular and I only caught on at the end of the season and wasn't able to collect nearly as many flowers as I might have liked. Nature wins again I guess.

Thank you!
*************************

I'm trying something totally new. In the early days of my jewelry making I bought a big bunch of "jeweler's seconds" drop pendants and settings, which turned out to be demo pieces with posts soldered on the backs. I finally figured out that I might be able to use them if I sanded the posts off and filled them with resin. I've gotten some interesting results:


Thank you for visiting my blog!  Chris

Thursday, November 11, 2010

INTRODUCING PENNEE, a new resin-pressed flower artist; and TRY SOMETHING NEW!

I'm honored to introduce Pennee, who is comparatively new to working with resin and pressed flowers.  I discovered her jewelry while browsing Etsy:  I asked her how she started working with resin, and some of the challenges she faces with resin and pressed flower:
My name is Pennee and my shop is Pennee Designs at Etsy. I started making jewelry many years ago and have gone in and out of it over the years.  Resin is my new love.

It was hard to learn since I had no class to go to and was basically kept at reading on the internet, watching YouTube videos and I finally got 2 books, "The Art of Resin Jewelry" and "The art of jewelry Plastic and resin"  I recommend the first book as it explains things from the beginning of the resin process. Mine came with a DVD which was nice and informative.  I usually buy books at Amazon as they have good prices.  I suggest making sure if you buy the first book, (by Sherri Haab) that you make sure it comes with the DVD.

One of the hardest parts of making a resin flower piece for me is keeping the small bubbles out and making sure there are no big ones that I have missed.  I try and slowly but with some force move the bigger flowers around to get bubbles out.

I use a stir stick or something without a point so I can press the flower down onto the first layer of resin which has already dried.  If the mold is see through I hold it up to a light making sure it stays flat so the liquid resin does not run out of the mold and onto the floor, (I've done this, not fun).

Once I move the flower around until I think any big bubbles are left underneath and looked at the flower from underneath I leave it but I will come back a few times until it is sticky and see if I need to pop a bubble.  It is OK to move the flowers around when they are almost sticky because resin will slowly slide back into any crevasses.  The problem with this is you have to be careful not to mess up the other flowers or things you have put in the mold.

One thing I just found out from a man who used to work with resins and plastics is if you put less hardener in the mix it will not harden less it will harden slower and that will cause less bubbles.  I have not tried this yet but it sounds like an interesting idea and I am going to do it for my next pour and I'll let everyone know what happens.
   Isn't her jewelry lovely?


TRY SOMETHING NEW:
I have been finding fun in trying new techniques; as long as I don't use expensive settings or too much resin, I have little to lose, and occasionally  some astounding successes.  Here  are a few examples that show you really don't have to follow the rules!
I didn't like the flower in resin by itself, so I glued it to a pendant setting I'd had for years; It didn't fit perfectly, but it sold right away so guess it was ok!
I wanted to try the "tray" shapes.  This didn't turn out too well, but it gave me the fortitude to try some other ideas with the mold.

I bought the pendant setting thinking it would be easy to add crystals or something to the bottom ring. But once I had put the red leaf and flowers in, I couldn't find anything to match. The piece I added still doesn't work so now I'm looking for a little brass setting for it to complete the piece. It may never happen, but I've learned a few things.


I wanted to try a flower on plain metal, without a resin background. Although I had trouble photographing this, I like the result.

Thank you for visiting, Chris


Monday, October 25, 2010

A Delightfully Different Pressed Flower Jewelry Artist; and To Dye For???

I'd like to introduce Wenland, a pressed flower jewelry artist with a different approach.
These flowers are on slabs of Onyx. I find the effect stunning! (http://www.etsy.com/listing/57061663/fireworks)
This looks like a tiny perfume bottle, but is a glass tile! (http://www.etsy.com/listing/57864868/red-tiny-flowers)


The next one features a flower on a mother of pearl flat oval:
(http://www.etsy.com/listing/57864868/red-tiny-flowers)


Wenland has been working with pressed flowers for 10 years now.  I love her work.


Re "to Dye for":  my biggest conundrum has been the question of coloring or dying the flowers in jewelry. I have literally agonized over this question, and at a couple of points actually nearly quit making my jewelry.
Many pressed flower artists--possibly most, add coloring or dyes to the flowers so they won't fade, and to correct colors that are off because of age, glues, spots, etc.  The World Wide Pressed Flower Guild (WWPFG) (http://groups.yahoo.com/group/pressedflowerguild/) has many posts, guides and classes about how to use dyes and colorings, the products, and different results obtainable.  The best pressed flower artists in the world belong to this guild. ( I am certainly not in that category!) And some of the most lovely pressed flower jewelry on the market is made with flowers whose color has been enhanced.  (See Wenland, above!)


I love  the natural colors of flowers and find I prefer to make my jewelry without enhancing the colors. And I love the fact that vintage and antique lockets and pendants with the natural flowers show the lovely antiquing. Yet I started to be concerned that I was charging what I consider a large amount of money ($20.00: I'm from the old school--my kid says the VERY old school!) for pressed  flowers that would fade, be it in 2 or 5 or 50 years.
My friend  Dianne of a Gift For All Seasons, and my husband helped me see reason. She pointed out that we do the very best we can to adequately describe our product, and give instructions for taking care of it, and then it's out of our hands. My husband pointed out that if someone buys jewelry they expect to last a lifetime, they'd be more likely to pay $200 than $20.00 nowadays.
  So I've decided to try to follow the "Serenity Prayer" advise, and just make my jewelry the way that makes me happy.
Thank you for visiting my blog.  Comments are welcome.  Chris

 TIP OF THE DAY: I have been using Diamond Glaze to correct little scratches and sanded areas on my not-quite-finished jewelry, rather than mix up another batch of two-part resin, and the results have been good.

Sunday, October 17, 2010

RESINS, GLAZES, GLOSSES: Let's Make Some Sense of it All!

I've been working with jewelry-grade resins, glazes, and glosses for 5 years now, and until this week hadn't really sat down and separated out all the different types and brands of what are called resins.  Wow! I found a lot of cross over in terms, but managed to separate 3 basic types of resin products: epoxy resins; polyester resins;  water based resins (include ultraviolet resins).  Please note, I've tried to be accurate but there are so many products and so many variations that I'm sure to have erred in places.  I welcome your corrections and comments
A resin is a natural or artificial thick liquid  which becomes a hardened plastic-like substance on exposure to air. (Obviously, this is oversimplified; I'm no chemist.  However, this definition brings it down to the basic idea; liquid, exposed to air, plastic- like hard)
This definition explained one basic thing to me: you can't depend on the word resin to tell you how something will behave in crafting.

So lets break this down into the different types. I made a quick-reference chart.
A 4 year old Envirotex Lite pendant I left in a gold-paper covered jewelry gift box for 6 months.  It took on the color of the paper.


EPOXY RESINS: (can also be made into 2 part glues )-
    Definition:  two part resins requiring a hardening substance to be mixed together
     Advantages:  By far the hardest, most durable of the resin; 
     Disadvantages : Toxic: must use good ventilation, gloves, should use a mask
    Can discolor over time if exposed to ultraviolet light via  sunlight or fluorescents.
    Produce heat when curing: if mixed wrong can destroy embedded objects from the heat
    There is a limit on the depth to which it can be poured.
    Supposedly it is limited to 1/8 inch and is called "coating" however, I regularly pour resin     jewelry up to 1 inch thick without problem.     Bubbles can be a problem, but they can be controlled by  prewarming the resin; using a straw, heat gun or torch over   the top of the poured resin     
BRANDS:  Envirotex Lite,  Colores Doming Resin, Luxe Doming Resin, System Three epoxy resin (a marine grade resin, not generally used for jewelry;)
A pendant made several year ago from Envirotex Lite.  It is so hard I can't scratch it. It has been dropped, stepped on , and otherwise mistreated; is still great.Flowers are (non dyed) forget me nots.

 
POLYESTER RESINS: Still 2 part, but uses a small proportion of hardening catalyst to large proportion of resin
         Advantages: more forgiving of proportions; also extremely durable
         can be mixed thicker ; is called casting resin for this reason   
        Disadvantages:  a very strong noxious order; it will sometimes
         remain with the finished product for a week or two
        Toxic: must use ventilation, gloves, mask (if nothing else,
         to help cut the odor!)
         Bubbles; but they actually resolve on their own better than in epoxy resin
         Messy
BRANDS: Castin' Craft EasyCast Resin
 
WATER BASED RESINS OR GLAZES

         These include resin gels, glazes, uv resins, some glosses,
         "liquid glass."  These generally don't require mixing, although
         there are some embossing powders which fall into this
         category, which can be melted into a glaze.(UTEE)
   Advantages:  generally don't have to be mixed (generally come in a squeeze bottle)  so less
        messy and  easier to use. Dry faster, often with a uv lamp or low heat oven.
   Disadvantages:
       Used for surface finishing; generally cannot make a whole piece of jewelry using just these
       products
      less durable and not as hard (scratch easier)
      more expensive
      Bubbles are harder to manage  (surface bubbles.)
  Brands:  Magic Gloss; Ultradome; Gel du Soleil; Diamond Glaze

As I said, I know the lists of the brands isn't complete.  But I hope this helps straighten out the types of resins for you.  Chris


Sunday, October 3, 2010

Interview with Dianne of GiftForAllSeasons, Etsy; and why I use resin instead of glass

I am so proud to be able to present an interview with Dianne of AGiftForAllSeasons, http://www.etsy.com/shop/giftforallseasons. I feel that she is the top resin-pressed flower artist on Etsy and also off!
   
DIANNE:

1)How did you first start working with pressed flowers?
I have been pressing flowers for as long as I can remember. My grandmother and mother were fantastic gardeners. I am self taught as far as learning the art of pressing flowers, and I did pressed flowers mats for photos, and some jewelry, and sold them at craft shows, church fund raisers, etc. I was hired by a lady who had a cottage industry who hired mothers that wanted to work from home making pressed flower jewelry, and still allowing us all to stay home with our children. I learned a lot from her. After she closed her company here in the states, I loved it so much, and decided to branch out and continue to do what I so loved to do. I have companies who buy from me, and sell my jewelry at different shows around the country. I found out about Etsy a little over a year ago. I was really intrigued, and scared at the same time, but all of my wonderful friends encouraged me to give it a try. I love selling on Etsy, and I have met so many wonderful people along the way, and we are all are so supportive of one another. It's a very nurturing environment for any crafter.
2) What do you enjoy most about making pressed flower jewelry?
I really love it all, every phase of it, from going to the garden centers, looking for that new found flower or plant, and taking in colors, shapes, and the unusual. I love gardening, so that comes very easy, from planting, watering, pinching, deadheading, fertilizing, weeding, and on and on, I love it all. Love getting up each morning to see what new treasures are blooming. I enjoy the pressing process very much as well. I find it very relaxing, and is such an important part of the whole process. How you placed a flower/leaf into the flower press, will determine how the jewelry, photo mat, etc. will look when finished. Pressing takes patience, and a lot of time. From carefully harvesting each tiny bloom, or leaf at it's most perfect, in shape, color, and size is so important. It must be done early morning, when not too hot, not wet, and when the flowers are just waking. Early evening is a good time too, once the sun has started to set, and flowers are not wet from rain or from watering. How it is placed in the flower press is how the finished flower or leaf will look. I go into another world, where time doesn't matter. I completely lose track of time, myself, and go into a zone of another world. Also true for when I start creating something new, whether it's for a wedding order, jewelry, a keychain, photo mat for my shop, doesn't matter, love it all. Many times in the middle of night I will get an idea, or inspiring thought, jot it down, or sometimes I just have to get up and put my ideas to into motion.
3) Can you tell us about some resin challenges you've encountered when working with resin and pressed flowers, and how you've overcome them.
Depending on the type of resin, I will have different challenges. Probably the most important thing is measuring the right amounts of resin/hardener/catalyst, depending on the type of resin, and mixing extremely well. If not mixed together well, the resin won't dry properly, and will remain sticky or tacky, and your piece will be unwearable.
I learned this the hard way. With my metal pieces, the resin I use doesn't set as quickly as the transparent pieces. This resin sets up slower, so you must "babysit" each piece to make sure the flowers don't shift, or move.
Toothpicks have become one of my most important tools, as I can pick up the tiny, and move the delicate flowers, without breaking them. Works great! Not so great though for my arthritis holding a toothpick like a pencil for hours on end. This will take several hours sometimes depending on the temperature, and I will sit and make sure each tiny flower is where I want it, and doesn't drift, or move out of place. The transparent pieces you must work quite a bit faster, as it will start to thicken within 10-15 minutes on a warm day, a tad longer on a cooler day. Air bubbles are always an issue. A hairdryer on low will help take care of most of them.

4 Do you have some hints for someone just starting to work with pressed flower jewelry?
Start small. Experiment with pressing flowers and leaves first, and see what works with your climate, and what is available. Pansies, and most leaves are always a great place to start, as they almost always press beautifully. Patience is key. I press flowers everyday during our Summer months, but once in the flower press, must wait at least 30 days, some flowers much longer, several months. No peeking! If you peek too soon, the flowers will rip, tear or stick if not totally dry. I live in a suburb of Denver, so our growing season in very short, 3, maybe 4 months a year, from late May to August, and if we are lucky, into September. Last year it snowed here the last day of Summer! Compared to California, the Northwest or the south, where in most locations, you can garden all year. So it's a mad rush to get enough pressed to carry me from Autumn till Summer of the following year. I need enough to create all Winter long.
Once you feel comfortable pressing, try anything, as long as it's not to thick. Look at shapes that appeal to you, things that will add interest. Some of the things I've tried to press, and wasn't sure if it would press well, turn out to be some of my favorites. Sometimes the tiniest of flowers or leaves, and be the most interesting, and compliment your creations more that a big accent. Know when to stop. Many times, less is more. Stop, and look before adding more. You can always add more, but once dry, very hard to remove flowers once resin is starting to dry, or is dried. Make sure your choices don't over power one another, but are in harmony with each other. Don't give up, it takes practice, and with each success, will encourage you to make another, and on and on. It's easy to become hooked on creating with pressed flowers.

5. The colors blends in your jewelry are stunning and often unusual. How do you decide what colors to use?
I choose what I like. I don't think there are any rules. Do what is appealing to your eye. I like bright, contrasting colors, such as bright blue and bright pink. They compliment each other beautifully. You can always lay your pressed flowers side by side on white paper before starting, and see what works, and what you like. Sometimes I just start making a piece, and go through what flowers just came out of the flower press. Some things work, some don't. But it's such a fun journey, and even my mistakes are a success, and a learning process. Trial and error is how I have taught myself, and over the past 24+ years have perfected some things, and still working, and learning on lots of others. Still learning, and it's never ending, always evolving, never boring. Still love it, and have such a passion for what I do, all these years later.


Thank you so much Dianne! You have been my inspiration.

WHY I USE RESIN INSTEAD OF GLASS
Some of the most beautiful pressed flower jewelry I see today is under glass. I love the  glass pressed flower work of Botanical Creations (http://www.etsy.com/shop/botanicalcreations)on Etsy, who has sold hundreds of pieces, all glass. Certainly there are advantages of glass: it is more durable; it is heavier (an advantage or disadvantage, admittedly).If you want the piece on a leather cord, you need a heavier piece. There are lovely Greek leather cords of all colors and thicknesses now. Often, a resin piece simply isn't heavy enough to sit well.
There are no problems with bubbles behind glass. Layering is simple, you just...layer; no pouring multiple times.  Finishing is easy.No sanding and re-pouring. The colors are not affected by glass, whereas resin can change the color of some flowers. Magnification is better with glass unless the front of the resin piece is quite thick in front of the flowers.
I've almost convinced myself,  but for two reasons.  The first is  an almost silly reason: I love the challenge! I worked so very hard for the first few years to learn resin, without any support. I had one booklet from the Envirotech company for the first two years until the internet grew and more resin products came out..  I'm proud of myself that I overcame a lot of obstacles to, eventually, produce nice jewelry. Certainly I could have saved myself at least a year if I had deigned to follow directions, but I did learn a lot along the way!
The other reason makes more sense: the use of a mold (outside a glass factory) means that the shapes for resin are almost unlimited. I spend a lot of time (and too much money!) looking for new pendant settings and for new mold shapes. I have a large variety of colors, as I've been able to add both opaque and clear colors to the resin . If I were more adventurous, and handier, I could make my own molds from silicone
So my reasons for using resin are the challenge and the malleability. I could probably sell more jewelry If I switched to glass, but then I wouldn't have the joy of doing what I do now.
Hint of the day  (I keep forgetting to include this!  Sorry): if you want your resin product flexible, add more of the less strong color. Resin dyes can be purchased in concentrated or regular, and in opaque or clear. In addition, you can just add acrylic craft paint, or powders. I've found that just about any additions except the concentrated dyes will change the resin''s flexibility.
Thank you for visiting my blog.  Chris


Thursday, September 16, 2010

I'll Introduce a Wonderful Resin and Pressed Flower Artist; and GOOFS with Resin and Flowers, and Repairs

   I'm proud to be able to present a well known Etsy pressed flower artist whose work I  really love: Dianne of  A Gift For All Seasons 
http://www.etsy.com/shop/giftforallseasons
 Dianne has been working with pressed flowers for many years, and excels in the craft. Her work has been featured in major magazines and she has sold lots of her work. I'm proud to say I'll be featuring an interview with her in one of my next posts. Her flowers are presented with both resin and  glass. The above, one of my absolute favorites, is resin, as are the next two:
This piece is so great, and shows what I love the most about Dianne's work:  her color sense.  She knows just what colors go together, and how--something I'm still learning. Aren't the graduated shades from pink to purple lovely?  The next earrings show same expertise:

The bright colors in the earrings complement each other wonderfully.  I'm looking forward to the interview--I have lots to learn from Dianne!


Now, for GOOFS:
I'll admit resin can be hard to work with, and easy to mess up. What I like, though, it that many of the goofs are just as easy to repair. Of course, sometimes there is no repair, except the "circular file."

That being said, I thought I'd show a few goofs, or potential ones, and how I've learned to fix or save them.  All the "goofy" pictures are mine; no one else would claim them anyway!

First: a "foreign object" found after you've poured the resin and it's dried, or at least too late to fish the offender out. The day I poured clear resin over the flowers above, I started out with just a couple. My dog was shedding that day, and even though I blew off my workspace with canned air before pouring, I found some tiny hairs the next morning in the piece.  I had three choices:  sand down to the hair and repour (making sure the dust from sanding is cleaned off--I use a baby wipe;)  toss the piece, or what I did, fake it by adding more flowers.  I actually like this piece better than the initial one.  

However, sometimes a bit of something is just too deep to sand:
 In the blue larkspur piece above, which I poured a couple of days ago, there is a little piece of stem that crept in.  It's way too deep to sand. Normally I would toss the piece; however it's one of what will be a pair of earrings that otherwise turned out beautifully; moreover I don't have any more matching larkspur in that size or shape. So I've decided, after review by my resident expert (my hubby) to ignore the piece and make the earrings anyway. If one looks, one can see the stem. But after all, us humans aren't perfect anyway!


 This black piece is bumpy and I unfortunately left it late (by about 2 months!) to correct it.  If one sands off the bumps and repours within a few days, it works much better. This late, it might or might not show. I've just left this one for my "orphans" sale bin at the next craft fair.

Which brings me to a very important point:  new resin pieces are not as hard as they feel/look for at least a week. If you accidentally have one piece touching another, they will become bonded. They scratch ever so easily in the first week. And, heaven forbid, if when you're sanding/cutting edges off and a scrap resin falls on a new jewelry piece, well, it has become part of it. Once the resin is about two week old, it is tough, and by the time it's a month old, the resin is extremely resistant to even determined scratching.

Sometimes a big bubble will form on the surface of a piece then you're not watching, and then break.  I treat that just like the scratches:  sand, clean, and repour--generally you can't even tell where the bubble was. Resin can be forgiving.
    The piece below shows another hangup:  it  had a second coat of resin to make them shiny after they came out of the mold and the edges are uneven.  The edges worry some. I just clip them down, use a sanding stick (about 200 grit ) to even them out; and if needed paint a little tiny bit of resin over the sanded edges--often it doesn't even show!

Often I have a piece of plant that either floats to the top of the resin and sticks out.  You don't want to leave the plant exposed to air;  it will rot. I just sand it down, if possible, and pour another layer. Or if worst comes to worst and I really like the piece, add another petal then pour another layer!

When you pour resin in a mold, you should pour carefully  (in the final pour if there are layers) right up to the top so it is a little rounded. Otherwise you have to sand the edges, which can lead to needing resin to cover the sanding, ....and on and on.

Thank you so much for visiting my blog.  I welcome your comments and suggestions, and I'd love to feature your work too!  Chris
    

Wednesday, September 8, 2010

How Pressed Flowers and Resin Interact

I just finished pouring resin for about 15, each very different pendants. Some are clear, some are on pendant settings, some are second or third (or even fourth) layers. I've learned I have to creep away from the pendants and keep my hands off until morning--even if I see something, through the clear cake coverings, that needs correcting.  Absolutely guaranteed, if I fix that one, I'll tip over or dip into or otherwise mess up two or three next to it.

In the morning I'll go out and anxiously inspect my pendants. Because of experience, most will be ok. But I'm sure I'll find at least one where the flowers have migrated to the edge --or off the edge, or otherwise  skewed.  I'll find one where the resin dissolved through part of a petal--hopefully  I'll be able to correct or cover it with another petal.  I'll find another where the flower or leaves are sticking out and will need two or three more layers for the pendant to be smooth. And I'll always find somewhere on one where the resin totally darkened part of the flower. 

Here's some examples of these common problems, and some possible but not foolproof solutions:
 In the above picture, part of the little wildflower migrated. Generally they wait to do this until you leave the room. Some flowers you can affix with a little glue, but I've found that most discolor when the glue hits the resin. Another solution is to pour just enough resin to fix the flowers in place, then go back in 45 minutes and pour over that to round off the pendant. I've found that if a flower wants to migrate, it will, even in 3 drops of resin. They're stubborn little things. And, admittedly, once I've spent two hours bending over pendants and resin babysitting arranging the  flowers, pouring the resin, clearing the edges, walking the resin out to the edges, etc, I'm usually too tired to go back until the next day. When its usually too late.
 
 The resin almost immediately (within 12 hours) discolored the red verbena.  That is more common with Johnny Jump Ups, so I was surprised.  I could have put another petal on top and repoured resin, but I didn't like the pendant enough to bother. A tosser.

The last  two show two problems: the fading and discoloring; and the daisy's center was so thick it would have taken several coats if I had continued with it. Note, though, I have put up to 12 coats to cover a flower I really wanted, and the pendant came out great.

I want to introduce you to a silver artist who just ventured into pressed flower and resin, and turned out a masterpiece in her first piece (her silver work really compliments it. Boy am I envious!)
http://www.etsy.com/shop/lissa73.  Lissa's pendant:
http://www.flickr.com/photos/lissaharlin/4961410953/
Thanks for stopping by!  Chris


Wednesday, September 1, 2010

Oh Good Heaven's it's September

I've gone along just having fun creating, experimenting, dreaming of new projects, basically clueless of the time flowing, until today, when it hit me: big craft sale; lots to do; start thinking increasing my visibility, catching up on the projects I don't especially like (read: sanding) and finishing things. I love starting projects, but finishing--I have at least 6 or 7 pairs of socks knitted half way; a whole tub  of unsanded jewelry; loads of cards to make. I'm ashamed to admit I started a sweater for my Uncle Bob 10 years ago and was "just finishing it up" when he died this year. I even have a few baby clothes 1/2 made for my (now) 21 year old!

I ran out of Colores Doming resin a few days ago; waited anxiously and did some sewing (I make fancy lacy panties custom sizes.) Now I could have prepared some new pendants--filling the bases with white, black or colored resin. But I told myself I couldn't really do anything without the doming resin. Hah! So I think I'm going to be feeling the  time push all the more. At least I have an excuse not to press more flowers since there are only a few blooming in our yard, and I caught up this year and have scads.

At least, I figured I can't really make Halloween jewelry, or Christmas--at least I never have. Then it hit me that I make lots of red flowers; have lots of greenery, there's no reason why not. So besides catching up I'm going to be looking for ideas for Christmas-y pressed flower jewelry.

Speaking of red, I want to introduce you to one of my favorite pressed flower artists: Kate Chu. If you go to her site:
http://www.pressed-flowers.com/index.html      you will see on the first page what I consider by far the most beautiful pressed flower art  piece ever. But like all artists, she's done a lot of different things, and two pendants of hers are wonderful:
 This wonderful (Christmas-y) donut pendant, and :
 I would have never of thought of the second one, with the writing!
 Let me know what you think.

Hint of the day: After you've poured resin and are ready to cover it (I use a clear cake cover from Safeway) use a magnifying glass or glasses to look at the piece from several angles. I work on a lazy susan so I can rotate the work without disturbing it.  Lots of problems will only show up from certain angles. This is especially true of domes and valleys with Envirotech Lite on corners of flat pieces; and cat hair or dust pieces.

Thanks for visiting.  Chris

Monday, August 30, 2010

Tools I Use with Resin; and a wonderful Pressed Flower in Resin Artist


I've been winnowing down the number of tools I use in working with resin and my pressed flowers. I started out with all sorts of fancy stuff I found recommended by the resin -making companies  and sellers of resin. I've winnowed  these down to a very few which I find indispensable:
From the left:  (1) Sandings sticks: these little goodies in come in multiple grits and the sanding paper can be moved around the stick; the papers are replaceable. I found them in hobby stores and tool stores on line.
                      (2) Microbrushes. After I saw a picture of these somewhere once, I googled them and found quite a few prices, and as usual a large variety of prices. I buy them by the jar of 50 at a time, and use several each time I pour resin, to spread resin to the edges; to move flowers around, to catch little pieces of plant  that I don't want in the piece of jewelry. The original ones I used to buy were metal and could be bent to an angle; I haven't been able to find those lately. These plastic ones will angle only a little but are still incredibly useful.
                      (3) A paintbrush for applying resin to the sides of jewelry. I buy cheap ones   in bulk so I don't have to try to clean and reuse them. I just have to make sure that there are no loose hairs before I stick them in the resin.

                      (4) A plastic flat-head tweezers. Also very inexpensive; they don't bruise delicate flower petals like the metal tweezers do.

                      (5) Disposable makeup sponges. Sometimes I buy the double-ended ones, depending on the price I can get for these in bulk.  I find them indispensable for wiping drips and run-overs of resin while I'm pouring and  repairing resin.

Not pictured, but what I also use are: little 1 ounce medicine cups in which I measure my resin; I buy them by the 100 from our local pharmacy; disposable plastic 2 ounce bottles with which I dispense the resin after the two parts are mixed;(boston rounds with dispensing tips), online),  baby wipes for spills; a microwave terracotta brick press, for the times I microwave instead of press drying flowers;  blotting paper (I googled for it online) and old phone books and bricks as weights, for regular drying of my flowers

I also want to introduce you to an  artist whose work I love.   Ruth of Buttermilk Lane
(http://www.buttermilklane.com/index.html) has been my inspiration for the 5 years I've been working with resin--she's been making pressed flower and resin jewelry for a heck of a lot longer than that!  Here are two absolutely  lovely pieces of hers. I don't know that I'll ever reach her level of expertise or her artistic ability with flowers and resin! 


.Thank you for visiting my blog.  Chris

Monday, August 23, 2010

Bubble Trouble

Hi, thank all of you for the great response for my first two blogs. I am greatly encouraged! Sometimes I feel like I am a tiny invisible mite in a huge sea of resin workers, bloggers,  and, especially, jewelry sellers.

 One of the biggest difficulties I have in working with resin and flowers is with the resin molds, which I call reverse molds, because the face of the piece is at the bottom of the mold. (I get my molds at Michaels, or online at Resin Obsession or other craft sites.)
  After I spray the mold with mold release (available wherever the molds are sold--ooh, sorry, it rhymes!), I set the mold upside down on a newspaper to dry, at least a couple of hours; then I respray it and again let it dry.  I'm finding that spraying it twice results in very shiny pieces.) Then I set the flower  face down in the mold; pour in enough resin to just cover the flower and then press gently on the flower with a sponge makeup stick to press the air bubbles out. The problem comes either with obstinate bubbles as in the piece above, or in very delicate flowers which bruise:
so if I push on them the petals either show darkened, or eaten out. Sometimes the flower is full enough that I can moisten it first with resin or pull it into the resin with plastic flat tweezers, thereby avoiding the bubbles, but most flowers tear or fold if I try that.
   

 Basically, it's come down to patience: small taps or pushing gently on the flowers to walk the bubbles out to the side  and  avoiding using the most bruisable flowers in the reverse molds.

Now just a small mention about the bubbles you get on the surface: these are pretty easily taken care of by gently blowing on them with a straw; or passing a heat gun over them, or in the case of more obstinate resins that really don't want to let go of those bubbles, I've used a little butane torch to pass the flame over. Since I mostly use Colores Doming Resin or Colores general resin, I can get the surface bubbles off with a straw.

Thank you again for your encouragement!  Next blog I'll show you a few pieces by other resin-flower artists which I absolutely love. Also, I'll discuss  the  few of the tools I find absolutely essential in working with resin.  Chris 


Friday, August 20, 2010

Those pesky bubbles!!!

Bubbles are the bane of any resin artist.They appear for many reasons, and generally once they appear there is often little you can do except ignore them or toss the piece.

I've found that there are three main types of bubble problems: the first is the tiny bubbles throughout the resin, making the piece look either ethereal, or cloudy, depending on luck and your intention. The larkspur earrings, above, had bubbles throughout. 

The other day our house was very very hot as the air conditioner was broken. I was going to pour resin; in my wisdom I decided that the resin surely would not need to be heated, since the house was so hot already. I ended up having to toss 2 ounces of the resin because it was so full of bubbles I could barely see the flower! I'm not sure what running the two resin bottles under hot water for  a few minutes does, but when I prepared the next batch, I did heat it up and had no problem.

All the posts I've seen describe several causes of bubbles: not heating the resin; stirring too vigorously; old resin (in my experience, older than 6 months, are a few.

The next couple of posts will discuss two other types of bubbles: reverse mold bubbles under flowers, and surface bubbles you can often "blow" off.

Hint of the day: don't store clear resin jewelry in a gold-or silver-paper covered gift box; the resin will take on a yellow ugly tint.

Thanks for visiting my blog.  Chris

Thursday, August 19, 2010

Resin and Flowers: How I Started

After this post I promise I won't talk about myself, but this once I thought I'd answer a question frequently asked: what made me start in resin.

In the 60's in college I bought a green glass two-sided pressed flower pendant. I loved it and still have it.  For years I thought about doing something similar, but I didn't have time (and the will) to start a new craft until about 6 years ago, when I kind of burned out on machine knitting.
I looked on line for embedded flower jewelry, realized I didn't want to work with stained glass, and found resin. There wasn't a whole lot of anything on line 6 years ago but I found Envirotech Lite, and Easy Cast. I bought a couple of books on pressing flowers, started to raid my husband's garden, and started. I basically just experimented for the first couple of years, and most of my experiments were pretty awful. I did come out with a few pieces that are still nice today, but that was the exception.
    I gradually improved, and more important, started following the directions and being more careful (patience isn't my strong point) and my jewelry started improving. I actually sold several hundred dollars of jewelry in my first craft show 4 years.   But in the last couple of years, new products have come out and lots of other more experienced resin artists are now on line.  Furthermore, there are lots of pressed flower experts.  I belong to the World Wide Pressed Flower Guild,(online) where many of the top pressed flower artist in the world congregate, teach, and commune.

I started selling on Etsy a year ago. Since I continue to work full time, I haven't devoted a whole lot of time or energy promoting; but I've been honored to do several custom orders, for wedding and funeral flowers, besides selling my jewelry online on Etsy, occasionally on EBay, at craft sales and off line. I'm getting near (partial) retirement and am devoting more time to my crafts--fancy panties and resin flower jewelry. I continue to devour everything I can find online regarding resin, and posted several times on Etsy forums.

I was looking for an active blog on resin-flower jewelry, and really didn't find any, so here we are!